Once you’ve already decided what plugin or solution you will use to translate your WordPress website, you’ll probably need professional translators. An excellent option to translate a WordPress site with professional translators is using TextMaster, a start-up company that offers professional translation services online by native translators in more than 20 languages at very good prices.

I will try to explain briefly the steps to carry out the translation of a blog post, although you can use this system to translate all the posts and pages of your web site:
Step 1. Register a free account
Before you begin, it is necessary that you register a free account at TextMaster:
1. Go to: Register new account in TextMaster
2. Enter your personal details and click on “Join TextMaster“.
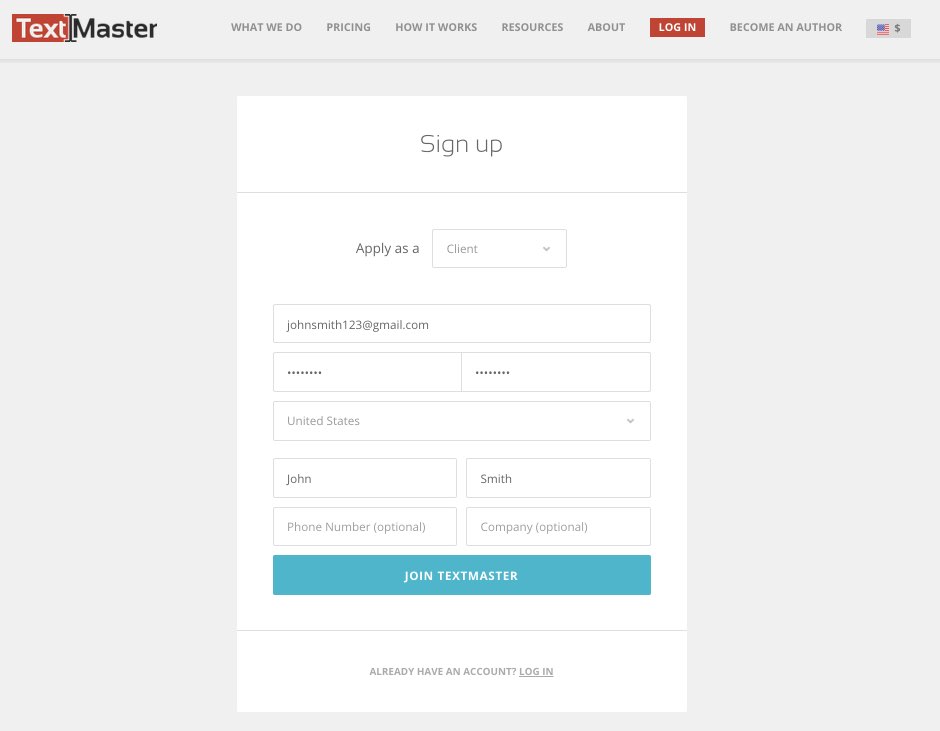
Step 2. Create a new project
Log in with your username and password, and create a new project:
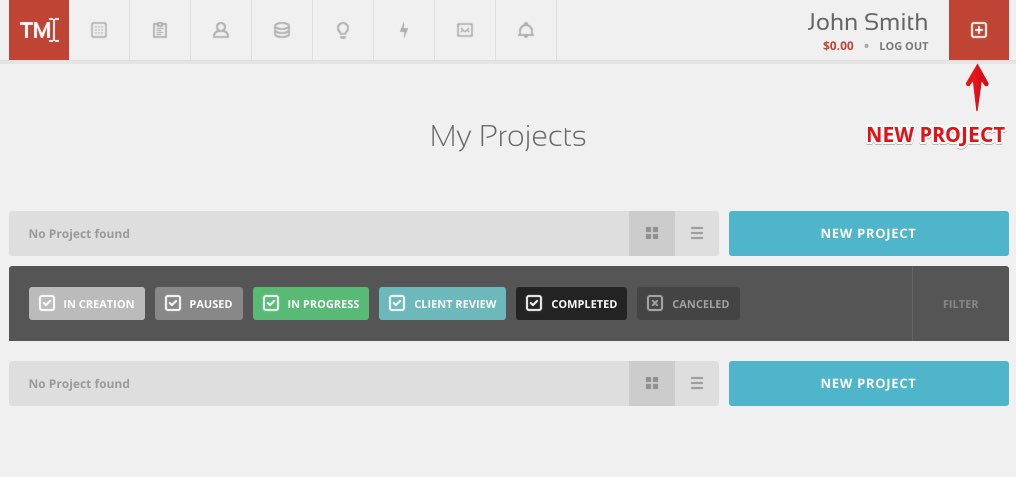
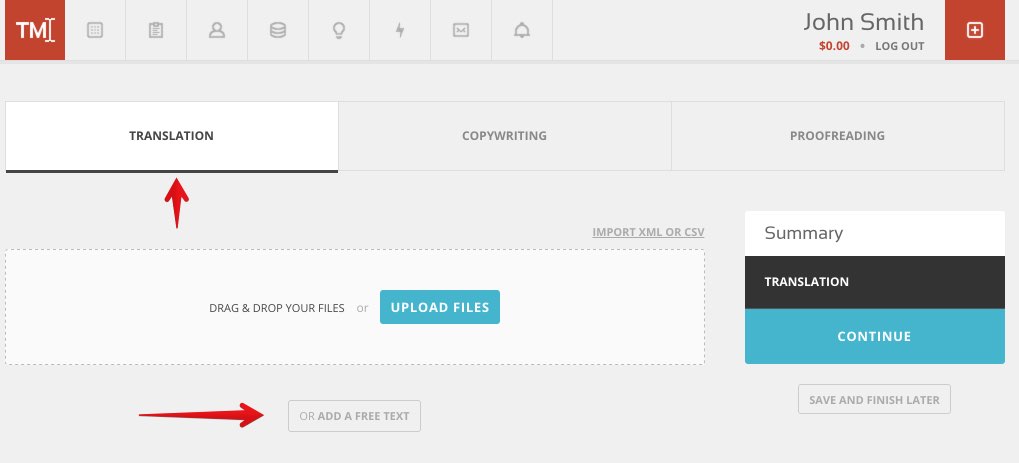
On the next screen you will have to click on “ADD A FREE TEXT”:
A pop-up window will open and you will have to click on “My text contains HTML code” and mark the checkbox:
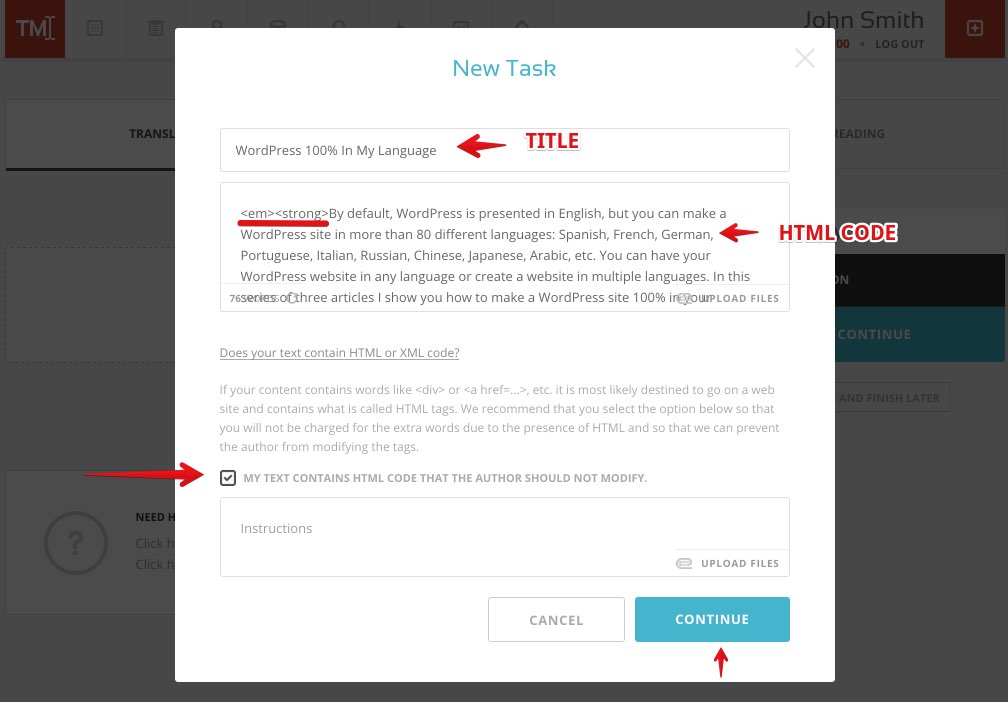
Then you must go to the WordPress HTML code editor and copy the whole post (title and content) and paste it into the TextMaster editor:
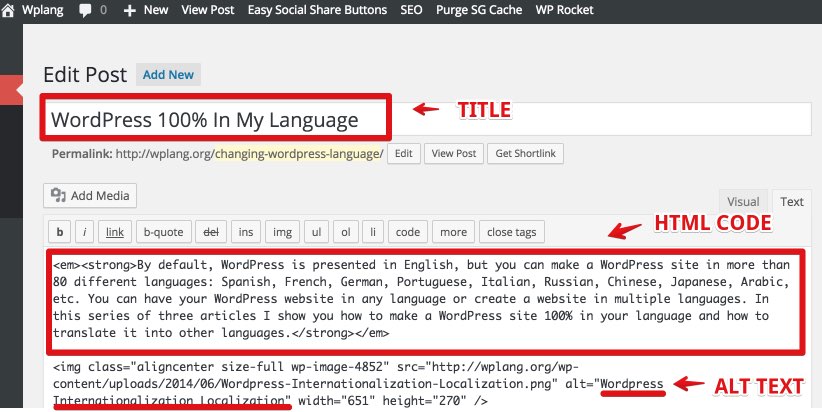
You can send for translation one or several posts or pages.
Step 3. Customize your order
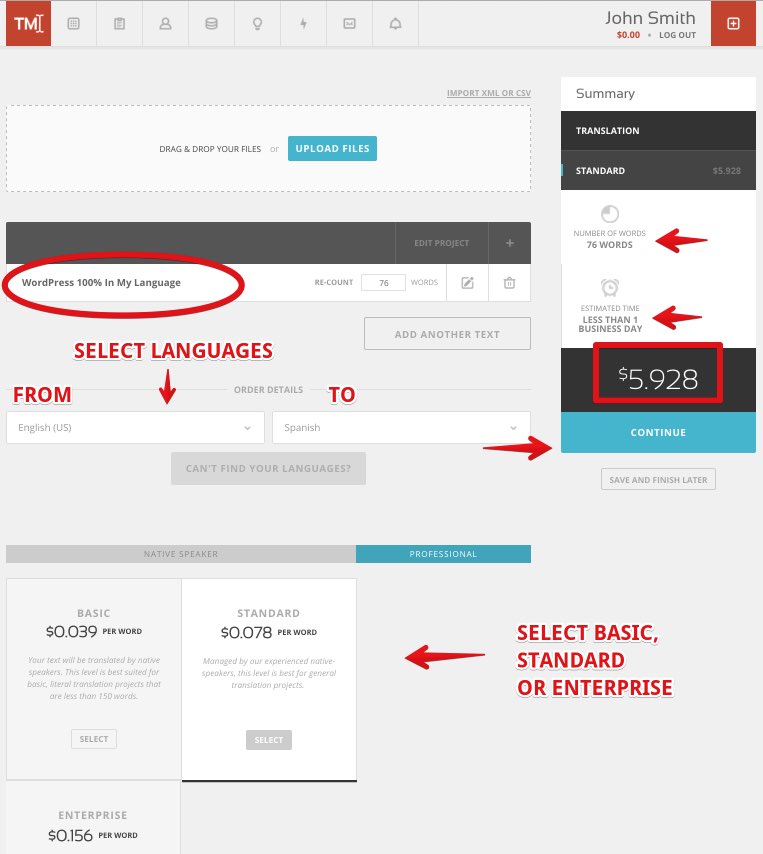
When you click continue you can select source and target language, and translation quality:
- Basic (€ 0.03 per word). Appropriate for basic translation projects, less than 250 words: basic website content, emails, comments, social media, etc.
- Standard (€ 0.06 per word). Translation is done by native speakers with experience. Appropriate level for larger translations: web pages, SEO web content, woocommerce product listings, etc.
- Interprise (€ 0.12 per word). Handled by professional translators and suitable for complex translation projects: technical web content, reports, legal documents, ebooks, etc.
You can also add quality control to your order or even order a urgent request for translation. The system will automatically calculate number of words, price and estimated delivery time:
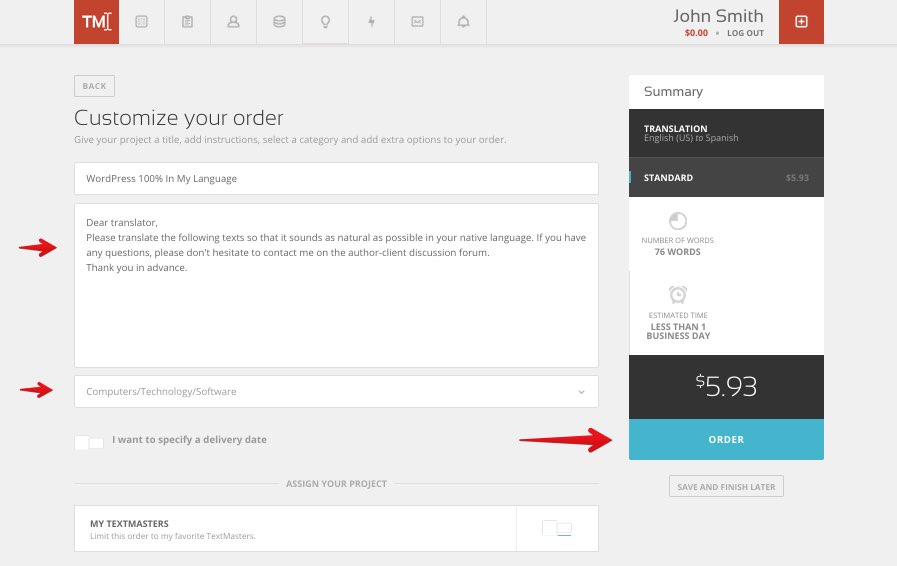
When you click continue, the system will allow you to give a title to your project, select a category, and specify additional instructions for translators:
Step 4. Payment
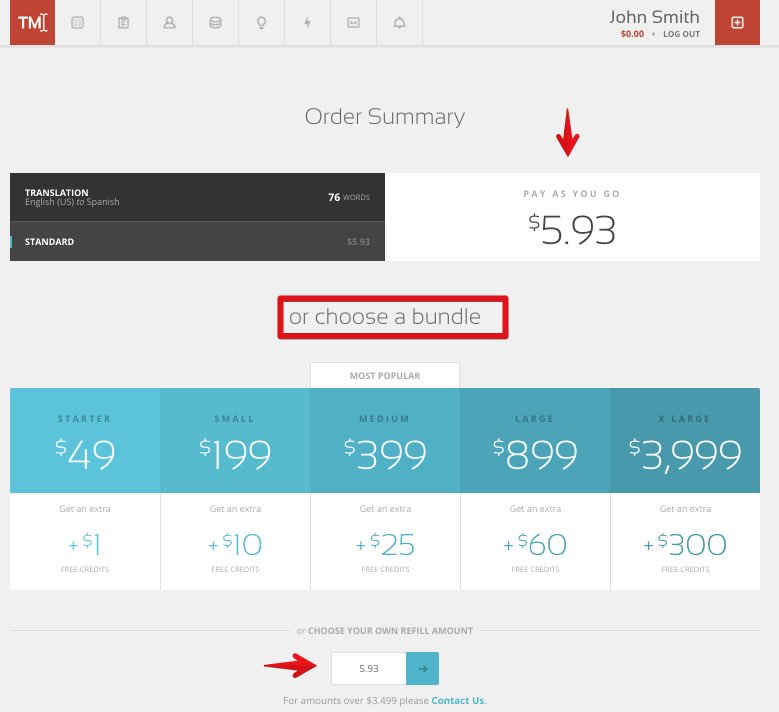
The last part of the process is paying for the project through credit card, PayPal or bank transfer. You can pay the exact price or you can buy credits:
Step 5. Publish the translation in WordPress
Once the translation is completed, just copy the text with HTML code and paste it into WordPress HTML editor: 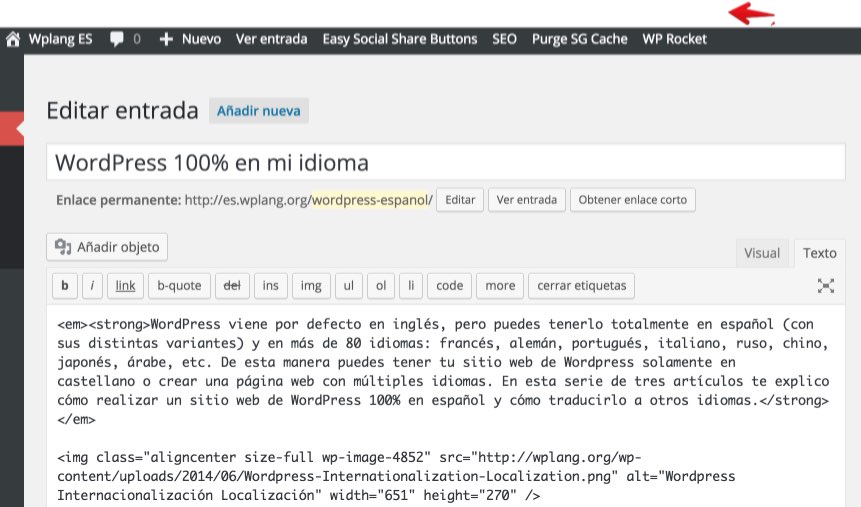
I hope this article will help you to translate your WordPress website